On various occasions I've been asked what growing media I'm using for my cactus plants. I don't have a set soil mix recipe as such – the mix is a continuous work in progress influenced by earlier results combined with input from friends, articles, etc (and sometimes laziness drives me to use whatever ingredients I have readily at hand ;-) Anyway, a few weeks ago I mixed a large batch of growing media and decided to document the details. If you have any comments or suggestions for improvement, please let me know.

Cactus soil mix
As mentioned, I'm not religious regarding soil ingredients as long as the mix meets a few simple criteria. Good drainage and aeration is essential in any growing media used for raising cacti, still the growing media must have adequate moisture retention properties in order not to dry out too fast after you water it. Depending on the type of cacti you are growing you might vary the amount of organic matter (or omit it completely). I don't worry too much about nutrients in the soil – if you are using a pure mineral soil you'll have to supply most nutrients via fertilizers anyway. Finally it is also important to tailor the mix to the environment you grow the plants in, i.e. you have to factor in if your pots are clay or plastic, the climate you live in, your water regimen, etc.
I've heard it said that there are probably as many soil mixes as there are cacti growers. This post is the current take on my recipe for a cactus soil mix ;-)
The ingredients
Below you'll find the list of ingredients that I'm currently using for my cactus soil mix.
Unprocessed, raw moler

Unprocessed moler
Moler is a naturally occurring mixture of diatomaceous earth (a soft, chalk-like sedimentary rock) and bentonite clay, approximately 60% diatoms and 40% clay. Moler is quarried not too far from where I live, so once in a while I swing by one of the defunct quarries that are open to the public and fill up the car ;-) Instead of moler you could use chunks of granite or whatever rock is available to you – the advantage of moler is that it is very lightweight, but it is probably not very easy to obtain outside of Denmark. These larger pieces of rock are added to keep the soil open and allow air to get to the roots, furthermore the rock will reduce the volume of water a given amount of soil can hold.
Sharp sand

Sharp sand
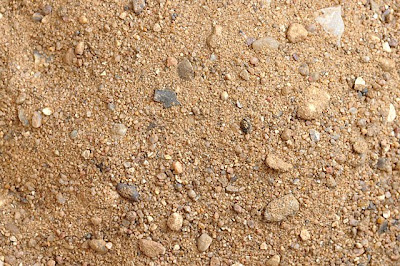
Sharp or coarse sand (grit) should be readily available everywhere (otherwise ask your mason ;-). The sand reduces the soil's ability to retain water.
Limestone gravel

Limestone gravel
Many cacti, including Ariocarpus and peyote (Lophophora), are native to limestone areas, often growing within cracks in the limestone boulders themselves. For such species I'm adding a bit of limestone gravel to the soil mix – please note we are talking limestone and NOT lime which will scorch your plants. The limestone gravel also reduces the volume of water a given amount of soil can hold
Cat litter, baked moler

Cat litter, baked moler
It almost goes without saying that the water absorbing and retaining qualities of this product are excellent ;-) Still, this type of cat litter don't feel soaked even when fully wet. To the best of my knowledge this product is widely available, but watch out for the scented variety – unless you want your plants to smell of cheap perfume ;-) If you can't find this type of cat litter you can try substituting it with crushed brick.
I once used small LECA pellets but stopped as they have a tendency to float on top of the soil and also they don't retain much water.
Cat litter, bentonite clay

Cat litter, bentonite clay
Another water absorbent. I read somewhere that peyote and Ariocarpus enjoy pellets of clay in their soil, so I decided to try adding some of these bentonite clay granules.
The clay granules do not dissolve when watered, i.e. the bottom of the pot will not clog up because of the clay pellets.
The mix
I recently repotted a handful of newly acquired Ariocarpus plants in the following mix:
- 4 parts unprocessed moler
- 3 parts sharp sand
- 2 parts limestone gravel
- 2 parts baked moler (cat litter)
- 2 parts betonite clay (cat litter)
Coir

Coir
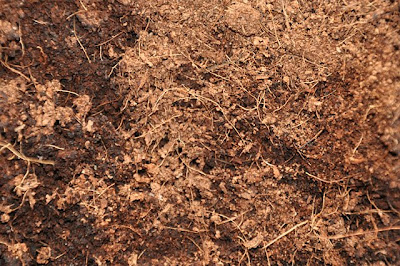
If you want your soil to hold more water you can add coir (a product made from coconut fibers). I used to add peat moss (sphagnum) but nowadays I prefer coir for several reasons. First of all completely dry coir is easy to wet while completely dry sphagnum moss seems to almost repel water. Also, peat moss is mined out of bogs, and takes years to renew. Avoiding peat and going for coir will make a bog somewhere very happy ;-)
What others say about soil mixes
Soil mixes were also recently discussed on the cacti_etc mailing list resulting in some interesting replies, like:
Now pretend that I also gave you 500 additional words explaining why this mix, or any other general mix, may or may not kill all of your plants. The appropriateness of any mix depends on so many things, like what plants you're growing, what kind of pots you use, the size of your pots, your local climate, whether or not you have a greenhouse or are a windowsill grower, your watering habits, etc.
And the slightly more humoristic approach:
Just keep in mind that, for succulents and cacti, you want a pot and soil mix that dries out in about 5-7 days after you water it. You can't control the humidity and temperature but you can control the soil mix, the size of the pot, whether the pot is clay or plastic, and how often you water. (Well, some people can control how often they water--others can't. Those are the same people who can't stop giving their dogs treats.)
If you are looking for general information on cactus growing the cacti_etc mailing list is a good place to go.


